Using the same fabrics from the first week's assignment, I sewed up the Ohio Star and Shoo Fly blocks for the second week of the Sew, Mama, Sew! Quilt Month Block-Along. And I gotta tell ya, I like them. All the corners came out really well. And I finally learned why you should let your sewing machine do the work and not try to push and pull the fabric into submission...bias cut fabric will stretch! Finally! I get it!
After I figured out the fabric layout of these blocks I knew that I would add a black border once all the blocks were complete. It's very strange doing individual blocks and making decisions but not yet knowing how the whole project is going to turn out since someone else is in charge. Strange but fun!
The Shoo Fly (get tutorial) and Ohio Star (get tutorial) blocks were good introductions to right triangles and quarter triangles.
PART 3 - Log Cabin Variations
PART 1 - Nine Patch Variations
Monday, February 11, 2008
Sew, Mama, Sew! Quilting Month - Part 2

Friday, February 8, 2008
Ready for the weekend
I don't get much sewing done during the week since I have a full time job and just don't have time/energy at the end of the day to do much. So, you may have noticed that my posts tend to be very project-centric at the beginning of the week and then more inspirational towards the end. I'm fine with that...it seems like a good pattern.
So, I think I will now officially dedicate Fridays to what has been inspiring me over the week (more like 'this instant and subject to change any moment') and what I have planned to do over the weekend (Haha, we'll see on Monday's how close I get.).
First, some Flickr love: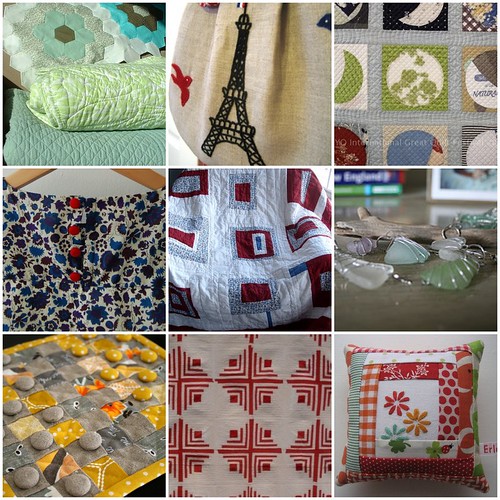
1. Quilts, 2. Embroidery Detail of Frenchy Bag, 3. Untitled, 4. Molly's Sketchbook: New Liberty of London + Amy Butler's "Anna Tunic", 5. The Big Day Finished!, 6. Sea Glass Necklace, 7. Checkers Quilt Detail, 8. Antique log cabin quilt, 9. Green Elephants and a Ladybug
And for this weekend? I have three things in mind:
1. Start cutting the husband's quilt and sew one block together to be sure it'll work out.
2. Sew Mama, Sew block-along continues! I think I'll do the Shoo Fly AND the Ohio Star in the same fabrics as my Disappearing Nine Patch.
3. Finish up that cross stitch alphabet project. No excuse for how long that's taking me.
Wednesday, February 6, 2008
You call that a craft site?!
Unusual sites to help with your crafting
Beyond blogs and forums there are lots of other sites online that can inspire and inform your crafting.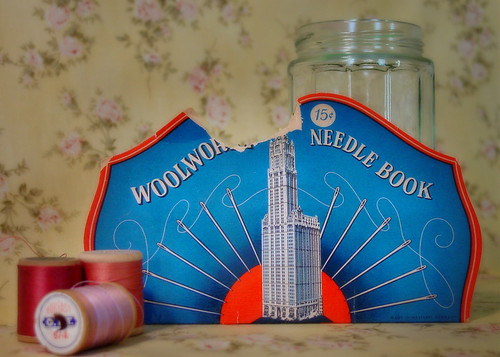
For Information:
Wikipedia - http://en.wikipedia.org/wiki/Wiki
So I got all into Sashiko recently and wanted to find more information. Craft blogs are not the best for searching and Google tends to list store sites first. So I tried this online, collaborative encyclopedia and got a pretty informative article with some links to more information at other sites. Now whenever I have a question about a technique or want a little background on a craft, I go to the Wiki first.
Yahoo Answers - http://answers.yahoo.com/
I can ask or search for questions...and hopefully get answers. Nada? I'll post my own questions and other users will answer them.
(Note: Need to register to ask or answer questions. You can search and read the information without registering though.)
YouTube - http://www.youtube.com/
Sometimes the words in a tutorial just don't click. I need someone to show me how to do it. YouTube has lots of videos showing basic to not-so-basic techniques. Check out this short video demonstrating hand quilting.
For Inspiration and Information:
Google Image Search - http://images.google.com/
So I found out some information about Sashiko from Wikipedia but there weren't any pictures (some entries do have pictures but usually not that many) and I like to see LOTS of pictures. Google Image Search results offer only images found on web sites. My search for "Sashiko" gave me almost 10,000 results. You may end up with some random volleyball pics but you will also see some really cool new ideas. (Turns out the volleyball player's first name is Sashiko.)
Flickr - http://www.flickr.com/
We crafters like to show off our stuff. Flickr not only lets you post your pictures for free, you can join groups to share your photos and information with other users. When I have a craft question, I go to Flickr first to ask other users. I get lots of good information and ideas really quickly.
(Note: Need to register to post pictures or participate in the forums. You can search and view images without registering.)
For Wanted Items:
CraigsList - http://www.craigslist.org/about/sites.html
Need a new sewing machine? Shelves for all that fabric? I often forget to look in the classifieds for items I need. Here I can search the biggest classified section out there.
For Organization:
Bloglines - http://www.bloglines.com/
There are many other 'feed readers' - Google Feedfetcher, My Yahoo, Firefox Live Bookmarks, etc. I just happen to use Bloglines. I'm able to collect all my favorite blogs in one place and I'm notified when they are updated. Makes my blog addiction much more manageable.
(Note: Requires registration and an initial set up.)
What unusual sites help you out with your crafty endeavors?
Tuesday, February 5, 2008
Mini Post: Freebie!
Happy Zombie recently posted a free pattern for the cutest little needle book!
You can get the PDF download through this link. I have been wanting to make a needle book...I'm putting this on the list of to-dos for this weekend.
(Photo from the Happy Zombie site.)
Inspiration Wire
 These 'inspiration wires' I've been seeing around blogland and on Flickr are right up my alley. Simple, useful and pretty. I've seen kits for sale but that just seems silly. Just takes two nails or tacks, a length of wire, cord or ribbon, and some clothes pins. All of which can be found in most basements.
Instructions: Hammer one nail or tack into the wall. Tie the ribbon or cord to the nail (or wind some wire around the nail). Stretch out the ribbon, cord or wire to where you want the second hole to be then hammer in the second nail or tack. Tie the other end of the ribbon to the nail. Easy.
To start off my inspiration wire (or 'ribbon' in this case), I printed out pictures of my pretty kitties and some of my favorite Flickr pictures.
See the full sized pictures (from left to right):
- Black cross stitch
- Framed cross stitch: Not from Flickr...unfortunately I can't remember where I found this sampler.
- Log cabin wall hanging
- "The Moon in Autumn" quilt from TOKYO International Great Quilt Festival 2008
- Izzy
- Pincushion
- Pillow
- Casey
- Pincushion
- Rauiri
Monday, February 4, 2008
Quilt Design Process 5 - Quilt Math

Thank you all so much for your feedback on the quilt layout. It made me so happy that so many of you responded...and so positively! (Please don't be afraid to speak up if you aren't loving something...I can take it.)
Now the quilt math begins. I'm making 10 inch blocks for a final quilt size of 60 x 70. (The layout that I was working on had 6 blocks by 8 blocks but 80 inches is just too big. Husband wants a big quilt but that's just getting silly. So the bottom row got hacked.)
I mapped out the block exactly and figured out all of the dimensions including seam allowances.
Then I made the cut list...enter the math:
All patterned fabric (each patterned fabric repeats 7 times):
- 7 – 4.5 x 4.5 (strip: 4.5 x 31.5)
- 14 – 5.5 x 1.0 (strip: 1.0 x 77)
- 14 – 6.5 x 1.0 (strip: 1.0 x 91)
Solid Fabrics:
Brown, Tan (each of these repeat 9 times):
- 18 – 4.5 x 1.0 (strip: 1.0 x 81)
- 18 – 5.5 x 1.0 (strip: 1.0 x 99)
- 18 – 6.5 x 2.5 (strip: 2.5 x 117)
- 18 – 10.5 x 2.5 (strip: 2.5 x 189)
Orange, Dk. Green, Lt. Green (each of these repeat 8 times):
- 16 – 4.5 x 1.0 (strip: 1.0 x 72)
- 16 – 5.5 x 1.0 (strip: 1.0 x 88)
- 16 – 6.5 x 2.5 (strip: 2.5 x 10⁴)
- 16 – 10.5 x 2.5 (strip: 2.5 x 168)
PART 6 - First Block
PART 5 - Quilt Math
PART 4 - Give Opinions
PART 3 - Fabric
PART 2 - Inspiration
PART 1 - Palette
Saturday, February 2, 2008
Sew, Mama, Sew! Quilting Month - Part 1
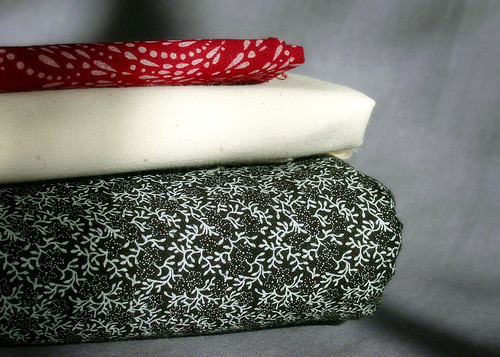
I don't have a huge stash of awesome fabric but I am very happy with the selection that I made -- from said stash -- for the first Sew, Mama, Sew! Quilting Month block. The theme of the week is the Nine Patch with variations. I chose to do the Disappearing Nine Patch (get tutorial here) and just make one block. I'd like to try the Crazy Nine Patch but want to wait until I: 1. have the time to do all nine blocks like in the tutorial and 2. pick out some new fabrics (see stash issue above).
I really like how the block came out though. I also liked just working on a single block. I took my time, made sure everything was even, ironed the bee-jesus out of it...stuff I might not do as well when I have a stack of pieces I'm trying to put together.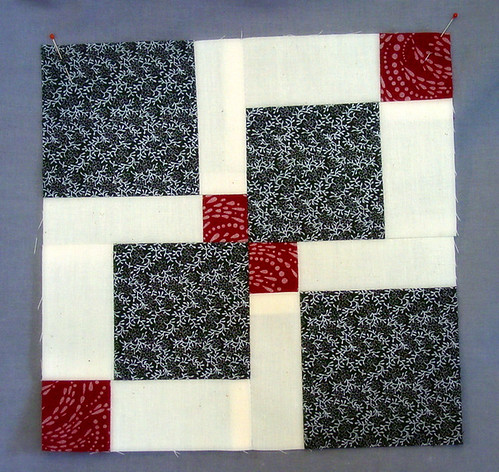
I'm going to wait and see what the next block is before I finish this one off...I may continue to use the same fabrics and then put them together somehow at the end.
Can't wait to see what everyone else did.
PART 3 - Log Cabin Variations
PART 2 - Nine Patch Blocks with Triangles